
"Hilda" Bag Tutorial
OK, really clever and artistic people such as Amy Butler always give their bags names. So I'm going to copy be inspired by them and name mine too. I have called this old lady "Hilda" because the shape reminds me a bit of a tea-cosy and the first one I made had lots of cats on and Hilda seemed an appropriate name (apologies to anyone called Hilda).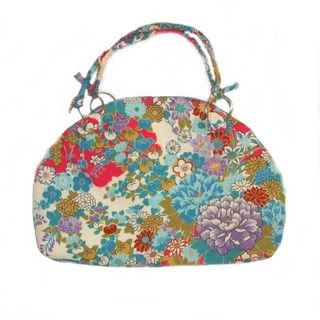
This bag uses:
Approx 1/3 yard each of fabric, lining, heavy sew-in interfacing and medium fusible facing. You will also need approximately 80cm of piping cord (mine was 6mm) and 4 O-rings. You will also need a good sewing CD (mine was Kate Nash) and a cup of tea (1 large cup, milk 2 sugars).
First, the pattern. I use fabri-baste to make my patterns as it comes in a roll and doesn't tear like tissue paper. Draw a rectangle 37cmx25cm (I'm allowing 1cm seam allowance). Mark 10cm from the top on each side. Mark two points 12 cm in from each of the top edges and then draw a curve between the points you have made.
Draw a line across the pattern 10cm from the top and mark on the curved edges - this will be your stopping point for your sewing.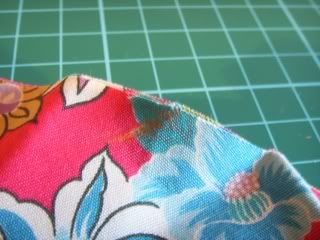
Cut 2 pieces of lining, 2 shell fabric, 2 iron-on interfacing and 2 sew-in interfacing. Iron the interfacing on to the wrong side of the shell fabric.
Also cut on piece of 8cmx24cm from the shell fabric and iron-on interfacing for the handle loops and 80cmx2cm for the handles (I've only allowed a seam allowance of 5mm for the handles, if you want a bigger allowance make it wider).
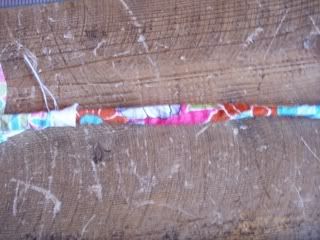
Make the handles by pinning and sewing the fabric strip, right sides together in one long , straight line. Use a loop turner to bring it the right way around to make a tube. Using the loop turner again, pull the cord through the fabric tube and cut in half. Neaten each end with a few stitches.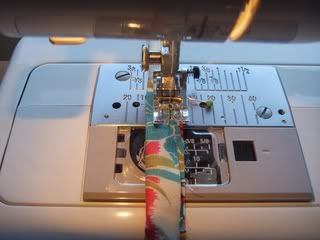
Make the handle loops by folding the strip in half lengthways and pressing. Open out again and fold each long side in to the middle fold, and then in half again. Cut into 4 equal lengths. Open each piece out and turn under 5 mm each raw edge, press again, pin and stitch all four edges.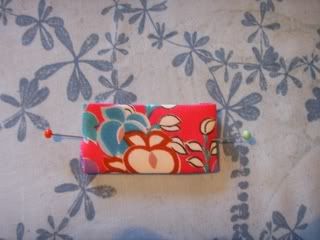
Make a point 5cm from the top and 5cm from each side. Fold the loop over a ring and pin and stitch in place with a few forward and reverse lines.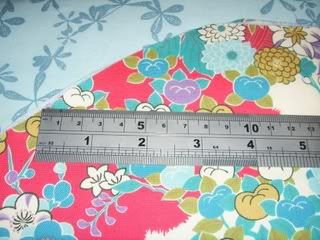
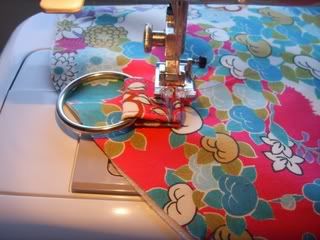
Make a sandwich with the 2 shell pieces together, right sides in, then the 2 sew-in pieces on the outside. Match marking and pin and stitch together, stopping and starting at the mid-points on the curve.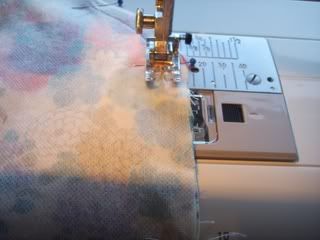
Flatten each corner by matching side and bottom seams, flatten to a point and mark a line 3cm down. Stitch this line and snip off the excess. Press.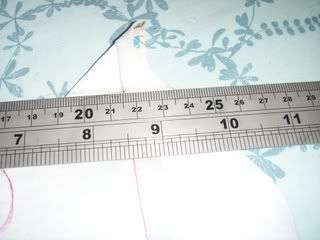
Sew the lining exactly the same way but leave a 10cm gap along the bottom so you can pull the bag through.
Turn the shell right side out and put inside the lining so that they are right sides together. Carefully pin and stitch the top seams, taking care to move the metal rings out of the way.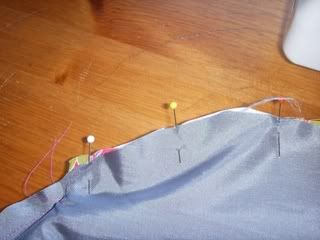
Pull the shell through the lining and stitch the gap shut.
Attach the handles and ta dah! One gorgeous bag made by you. Have a go - it should only take an hour.
![]()


No comments:
Post a Comment