
Showing posts with label Christmas. Show all posts
Showing posts with label Christmas. Show all posts
Thursday, 16 October 2008

Monday, 31 December 2007
What a haul!
OK, being the spoiled Mrs Marmadaisy that I am, I got LOTS and thank-you to anyone who bought/made me anything.
There were just too many to take pictures of but my favourites are:
This spool /thread holder that Ant made (all by himself, without prompting) which has 136 nails and is covered in the same wallpaper as my workroom. It has enough space for my embroidery threads and sewing cottons and it's so much better than having everything stuffed in a box.
He also made me this bird-house from reclaimed timber (hand-made and recycled! Good boy!!!) It has a little front door so we can put hay in for birdies to nest and a tray for seeds. We had to put the food on nails at the sides becuase the first bag of peanuts went to Paddy, who managed to jump up and pull them off the table.
My "main" present was a set of Le Crueset dishes which I have long coveted and never managed to get my mitts on. The pans and casserole are made of cast iron covered in enamel and the dishes are enamelled stoneware. They are Aga friendly, and I can't wait to cook roasties in them tonight.
And finally, this gorgeous necklace and earring set. I love it!
Thank-you Ant for my lovely things xxxx
Hope everyone else got what they wanted and had a great Christmas!
Being Paddy ....
Happy New Year everyone!
First of all, I have to share this pic of Paddy, taken while we were on our way out for a walk in the forest with Ant's Mum, her husband, and their two dogs. We had a great time and all the dogs were allowed off lead to have a good run along the path in Newborough forest.
This picture just sums up how much fun it is just to stick your head out of the window and smell the world whizzing by.
Paddy also got a new coat for Christmas (actually, just after Christmas). I made it from polar fleece and it's lined with red and white spotty fabric. I just love the buttons on the front. He looks so smart and he LOVES it! Sorry the photo is slightly blurred, he moved his head just as I took it.
Saturday, 22 December 2007
New shelves

One of my presents was this excellent set of nice shiny new shelves in my workroom. I've used the old cupboard for notions and knitting wool. I'm really pleased as this has freed up so much space.
He's also made me a thread holder but we need to get it on the wall before I can photograph it.
What a lucky girl I am!
Merry Christmas!

Wednesday, 12 December 2007
Dec the halls
Finally, I have put some decorations up. I tend not to be a tinsel-person, I prefer a natural look. Given that we live in the countryside that seems appropriate!
Anyway, here are some snaps of my decorations.
OK, they're probably not very flash but I like them - understated I think!
The mantelpiece.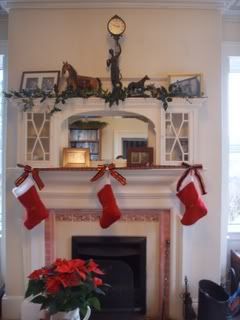
We are very lucky that we have a real fire in the living room but I think I might need to move those stockings if we light it. I took the holly from the trees in the garden.
We have a lot of conifers also, so I put lots of branches around our bookcases (yes I know we have a lot of "stuff" on them) and mingled in a few plain white lights. It smells wonderful.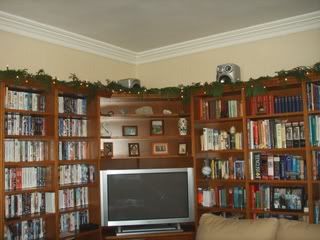
This wreath is donkey's years old but it looks nice and easier than making my own.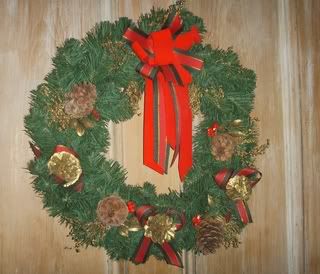
This is the only decoration in the kitchen at the moment!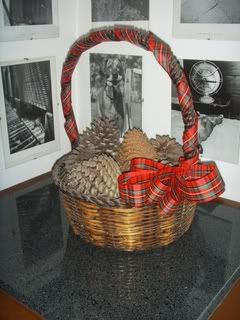
The pine cones are all collected from the garden (the ones Wizzle hasn't eaten) and they're just piled in a nice basket that I have wrapped some tartan ribbon around and made a little bow.
I have made these napkin rings for Christmas day - out of red felt stuffed yo-yos, with green floss and a vintage button. The ring is just made from thick (2") tartan grosgrain and stitched together.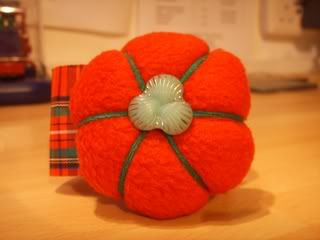
That's it!
And this is my hundredth post (hurray!)
Friday, 7 December 2007
Swapsies

Right, I have now finished my holiday swap "things".
Here's a sneaky peak :))
Hope you like them Gina!
Friday, 23 November 2007
More kitties and an apology
Firstly, I should say that thanks to Ali leaving me a comment, I have now found the link that I lost for the kitty pattern. Sorry about that, very bad t'interweb manners not to link to that the first time around (but I had printed the destructions out and didn't save the link so I forgot where I found it).
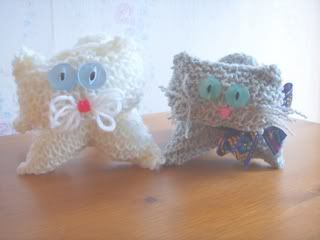
Anyhoo ***SPOILER ALERT***
Here are the new kitties that I can't stop making. Each one seems cuter than the last, and doesn't the fluffy eyelash wool work well?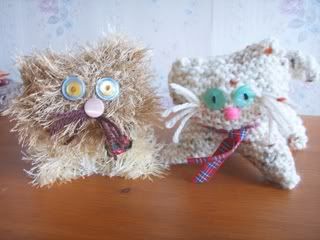
Thursday, 22 November 2007
Lisa's origami boxes
**** SPOILER : IF YOU ARE EXPECTING A CHRISTMAS PRESENT FROM ME YOU MIGHT SEE IT HERE ****
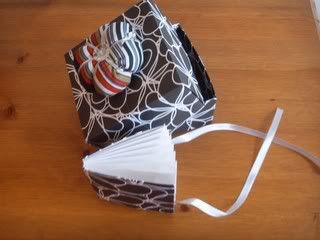
Thanks to Lisa and this tutorial, I am now addicted to making these little origami boxes. I used 8x8 and 12x12 scrapbook papers which have worked wonderfully.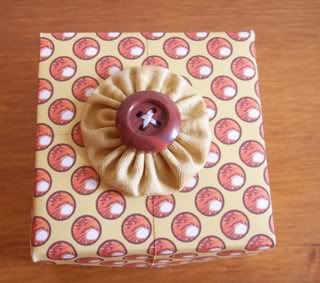
I have also made them with matching mini-books which Marie kindly blogged a while back. I figured they would make nice keepsake boxes for little trinkets and such.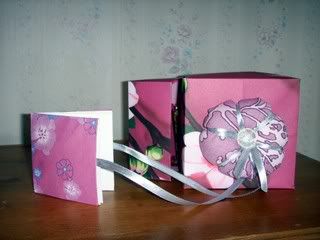
Fancy pins tutorial **spoiler present alert**
**** SPOILER : IF YOU ARE EXPECTING A CHRISTMAS PRESENT FROM ME YOU MIGHT SEE IT HERE ****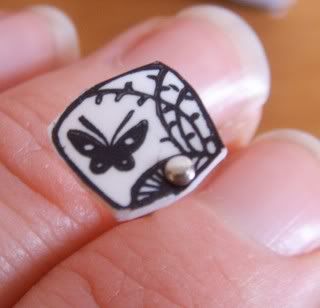
These are great for little gifts for your crafty friends. They are quick, cheap and easy to make and look ace stuck in a pin cushion.
You will need some stamps and some ink (or a suitable pen if you're a good drawer like I'm not) and a heat gun as well as some shrink plastic. All these items are available in craft stores and those of us who have gone through the card making/ scrapbooking phase will have these bits lying about. Probably.
Right, first of all choose a design with good clean lines and a solid outline (so that you can cut around it). You also need to bear in mind that the plastic shrinks (hence the name, shrink plastic, hey) by about 3 times so don't use a teeny weeny stamp or a massive one. I've used Hero Arts 18th Century fans, which are about 1 inch-ish. Stamp your image onto your shrink plastic. The ink stays wet so be very careful not to touch the design.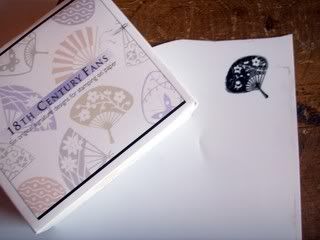
Carefully cut out leaving a small tab in place so that you can hold the stamped plastic.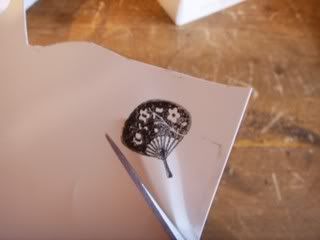
Stick a plain pin through a suitable part of the plastic, again being very careful not to smudge the design (or stab yourself, Marie).
Then cut off the tab bit. (You can see in this pic how the ink is sitting on the surface, don't worry about this at this stage).
Next, use a heat gun to shrink the plastic. Hold the design by the pin and be VERY CAREFUL as the gun will be HOT! As the plastic melts it will shrivel and twist, but don't worry it will be flat when it finishes shrinking. You can shape it by carefully presing the sides in place while it is plyable (again, it's hot so be careful).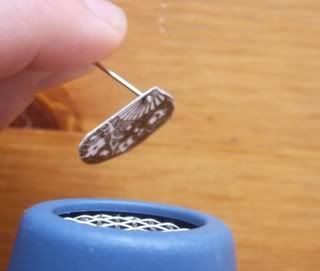
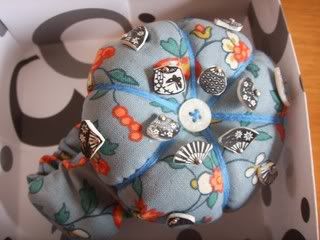
To make the pin cushion I followed this tutorial. I just cut a strip of fabric about 8cm by "enough to go around my wrist plus about half as much again". I folded it half right sides together and sewed and then turned the right way around and inserted a length of thick elastic (long enough to go around my hand when fully stretched) and tacked in place at each end. I folded one raw edge in on itself and put the other one inside it and double stitched together, twice. Then I used glue to stick my pin cushion on.
The boring bit: I designed this tutorial myself so please don't copy it unless you give me credit and link back to this blog. Thanks :)
Subscribe to:
Posts (Atom)


