Showing posts with label Wardrobe refashion. Show all posts

Sunday, 6 July 2008

Wardrobe Refashion gets CRIFTY

There's nothing like a couple of rainy days and work-overload to make you want to have a good old closet sort out.

Within a couple of hours, I had a nice tidy closet with lots of room for new things (hurray!). I'm visiting with my folks next week and I always ALWAYS end up shopping with my Mum.

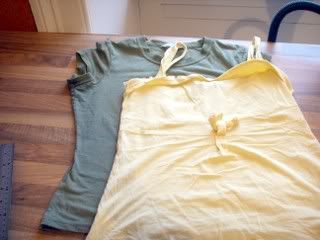
So, there was this for the charity shop:

And this for refashioning/ repair:

I can't decide whether to call this crifty (crafty+thrifty) or thrafty (thrifty+crafty). Either way, it's a couple of hours of crafting fun that costs no money - in fact, it saves money. So I can justify buying myself a new set of GHD stylers :)

I bought a set of three of these types of tops. They looked nice in the catalogue, but turned out to be shapeless, boring and unflattering. This picture does not do justice to how shapeless and baggy this top is. I only ever wore it for cleaning out the horses.
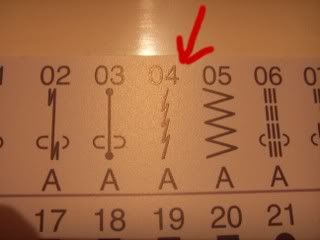
Restyle 1: I cut off the sleeves and resized the body by sewing (using a ball needle and stretch stitch setting) the sides again about 2 inches from the original side seam. I hemmed the arm holes. I tried the top on and measured under my bust (about 4 inches from the bottom of the arm hole). I then attached a length of ribbon just at the sides, so it would tie under the bust. I added a couple of iron on motifs from my stash.


Restyle 2: I cut off the sleeves and resized the original body. I cut the bottom off a jersey tunic which I loved but had ripped across the bust. I made bell sleeves out of the old tunic (I just cut across the bust, then split the bottom section in two and re-sewed to make sleeve shapes, using the old brown sleeve as a size guide for the arm-hole) I also removed the faux buttons from the brown top, and the faux white undershirt piece which was in the V-neck, and replaced with a section from the patterned tunic.
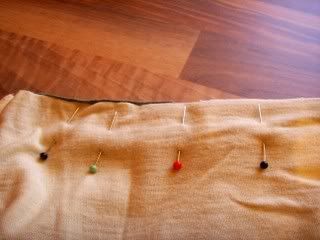
Refashion 3: I cut off the sleeves and resized the original top slightly, keeping it still quite loose fitting. I cut the collar and sleeves off a too-small shirt and stitched them to the blue top. Be careful to make sure you keep left and right sleeves on the correct sides or the fit will be wrong. I used lots of pins for the collar and sewed it inside first (inside of collar to inside of neck), then folded over and top stitched it on the outer edge of the neck (under the collar flap) to catch the raw edge within the stitching.


I also took off the faux buttons and faux undershirt piece and used a hook and eye fastening to bring the neck edge in.

Refashion 4: This was a polo shirt that I loved but refused to stay fastened and kept bursting open, and a cute T-shirt (size 8!!!). The T-shirt was tightest across the shoulders so to ease that I cut out the sleeve pieces, leaving just the neck intact. This made a vest shape which then slipped over the polo shirt, covering the gaping area.
You can't see very clearly but the polo collar comes over the top of the vest.


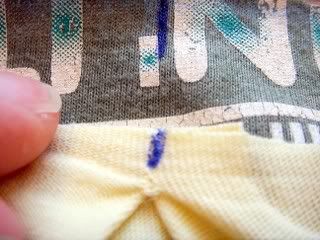
I also made some darts in a baggy shirt to make it fit better.

I finally got around to sewing a ripped side seam in a much-loved knitted sweater.

I removed the tatty lace from around a vest top and replaced it with new lace.

I found a corset style top which was too small (another size 8! my boobs must have grown a lot lately!) which I fixed by making an insert from cotton and sewing under the corset fastening, so that the lace can be left looser and what would have been exposed skin underneath is covered by fabric. I haven't taken pictures of these ones though.

I am left with a pair of trousers which are nice but are made an itchy fabric, they need to have a lining made up from cotton, and a plain white but too-big T-shirt which is going to be turned into a halter top when I get around to buying some lace for it.
I hope you enjoyed this little fix-it. If you want any further details, send me an email and I'll happily send you the destructions.

Friday, 11 April 2008

WIP finished!

I finally finished my scarf last night. I wanted it long so I could pretend to be Isadora Duncan in my car (not really).


It's a spring scarf, as it's not quite warm enough to have bare necks but too hot to be all bundled up. I love the wavy texture and the way it flows.


If you want the pattern - which is EASY - here it is.

I used two yarns - 4 ply grey and 2 ply dusky pink and knitted on 6.5mm needles. You'll have to swatch it up to get the effect you want - but you can use pretty much any gauge or any yarn and just adjust the number of stitches.

Cast on 35 stitches (or any multiple of 3, plus 2 extra for a wider or narrower scarf)

k1, *k1, yo, k2tog repeat from *, k1

Continue until your scarf is long enough!

Thursday, 10 April 2008

Next!

Because I'm so busy at the moment with my Welsh exam coming up, loads of essays to research and write, my FQF commitment, work with the Guide Dogs to do and everything else, what I really need is not one, not two but three new projects [insert sarcasm here].

#1 I've just received my Japanese fabric to make my Amy Butler top. I wanted to get this done for April's competition but hmmm... let's see.

#2 I really need (want?) a new patchwork bedspread for our bed. With three dogs in the house things tend to get a bit trashed here. I've bought some gorgeous strip rolls by Moda and, in theory, the simple quilt I want to make shouldn't take too long.

#3 I'm moving on from my "one skein wonders" and have decided to step up my knitting. I've almost finished my current WIP and the next thing will be this vintage pattern.


I'm hoping to avoid the inane grin.

It's no wonder the vacuuming doesn't get done!

This is my 189th post so I must do something for the 200th. I've done a couple of giveaways now so suggestions in the comments box please. What would YOU like?

Tuesday, 25 March 2008

The Anna Tunic

I was lucky enough to be chosen as one of March's U-Handbag Amy Butler contest winners, and as my prize I chose the Anna Tunic from the range.

Photobucket

Over Easter, I've been having a little play with it. It's always a good idea to trace out your pattern onto tissue or tracing paper so that you can make adjustments to it without spoiling your expensive pattern pieces - I like fabri-baste. I always make a "test" item first too, before using my more expensive fabrics. I used some donated fabric to test out the pattern - and it's still a really cute and wearable fabric.

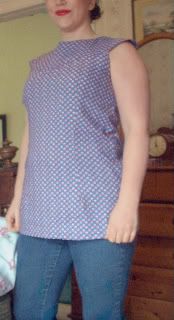
Anyway, I made up the pattern as per the instructions and, before hemming, I tried it on. I had made the version that was between my size and the next size up, just in case. It's easier to make a garment smaller than bigger. Anyway, it was way too big so I redid the side seams.

It wasn't a very flattering cut for me because I'm getting curvier as I get older. To be honest, it looked like I was wearing a bag. It's not so long ago that at that point I would have said "oh this doesn't suit me" and put it away in a drawer. But now I know better.

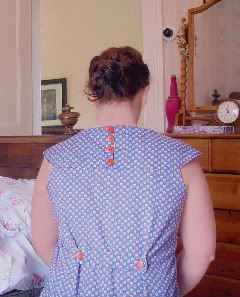
I put the tunic on Mary II(my dress form), and marked where darts should go under the bust. I made these long darts that almost go to the bottom of the tunic. I then gathered the back and pinned where it should "sit" on the waistline.

Photobucket

I used machine basting to do the darts (so I could check on me if it was a good fit), then sewed them when I was sure of the measurement.

To fix the back, I made a fabric strip 8" x 6" which I folded as I would a belt (press into the middle, fold in the sides and edges, then sew all around) and I put a buttonhole at each end. I then used my marks from earlier and tacked buttons in place on the tunic back (further apart than the length of the strip) then attached the strip. I then tried it on again and it's much better.

Photobucket
On this picture it looks like the buttons aren't straight, it's just the way I'm sitting!

I hope it does justice to the original. I just need now to make the alterations to my fabri-baste pattern and the next one will be entered into April's competition.

I've also made a skirt that just needs a little hand finishing, but I have a mountain of University work to do so it will have to wait.

Hope everyone had a great Easter and didn't pig out on too much chocolate.

Thursday, 20 March 2008

Mini Refashion - Sweater to vest

I didn't take a before shot of this one, because it was a spare of the moment re-do and I didn't think of it. This literally took 15 minutes to do.

Photobucket

My neighbour donated a big bag of scraps and amongst them was a jumper that was labelled a size 16 but had obviously had a little washing accident. When I tried it on, it fitted perfectly in the body but was way too short in the arms.

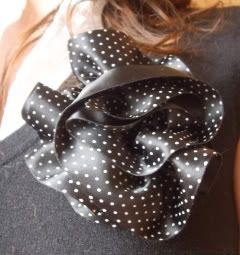
I cut off the sleeves (on the sleeve side, so the stitching around the arm hole is intact and therefore won't fray), and added a little ribbon flower. And that's it!

Photobucket

To make the flower I used about 40 inches of thick silk ribbon (about 2"), ran a double length of thread along one edge and pulled the thread to make a gather. I then just rolled it loosely until I liked the shape and stitched it at the base. Then I stitched it to the top.

Photobucket

OK, it's a little short to wear on its own, but with this vintage style blouse underneath I think it looks great!

Tuesday, 18 March 2008

How To Re-cover A Lamp Tutorial


This is another of my super-easy tutorials. It took me less than an hour and a half, including making the tea and taking pictures.

This is my own work, please do not copy it. You can redistribute or post on your own blog linking back to me. Thanks!

We had had this old lamp for ages, and last year I hit upon the bright idea of covering it in glue and sticking fabric to it. It didn't work and made a mess but Mr Marmadaisy (being far too nice to say so) put it in the spare room anyway.

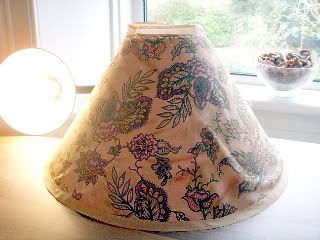
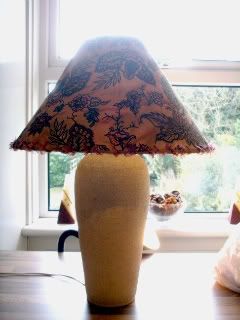
Having improved my skills somewhat I have had another go and it looks fabby now.

You will need:

Enough fabric to cover your shade (It depends on the size, obviously. Mine took 1/2 yard)
Some newspaper and masking tape
Scissors, blade and pegs
Some decorative yarn, thread or ribbon, plus a large enough darning needle
Some double folded bias binding
Thread
One large cup of tea with two sugars (optional)

How to make the pattern:

These shades are tricky to cover because they are a funny shape. Now, this will be a lot easier if yours is a drum shape, but my way (as always) makes things nice and simple for adapting to whatever shape your shade is.

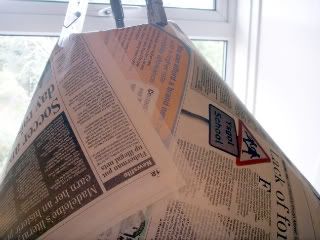
First, keeping the shade ON the lamp, start by pegging a couple of pieces of newspaper onto the top of the shade. Peg the pieces diagonally as this makes it easier to get the shape right. To start with, just peg the sheets at the top and tuck them in. You need to get them nice and flat.

Then, start to stick the loose sheets together at the edges using masking tape. We use masking tape because it can be repositioned easily. Take your time over this and make sure your paper is smooth, wrinkle free, and fitting like a glove.

Photobucket

When you are happy with the overall fit around the shade, trim off the excess paper at top and bottom. I found it easier to chop off the excess and then trim with a blade close to the edge of the shade. Check again that your paper pattern fits perfectly.

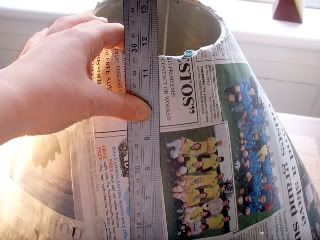
Now, using a ruler, mark a straight line down one side. Remove the paper template and cut along the line you have just drawn. Re-stick any paper bits as necessary and check again that the template fits perfectly (use your pegs again to keep it in place).

Photobucket

At this point, let me talk about fabric. Light bulbs get hot. Man-made fabrics often melt at fairy low temperatures. Use 100% cotton for this project, and do not exceed a 40w bulb. Check your fabric's care instructions before use. Please do not burn your house down.

How to put the shade together

Pre-wash and iron your fabric. It needs to be wrinkle free as there is no margin for error in this project. If you skip this step it'll all end in tears (believe me). Lay out your paper template on the bias. Cutting fabric on the bias makes it much more forgiving for this project. If you are making a shade with straight sides (like a drum) you will probably get away with laying it on the weft.

Pin in place and add a 1cm margin (this will be your seam allowance) to each of the straight sides, then cut out.

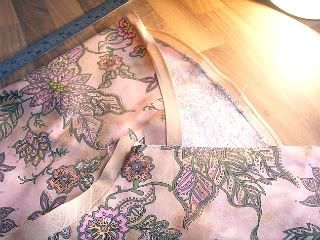
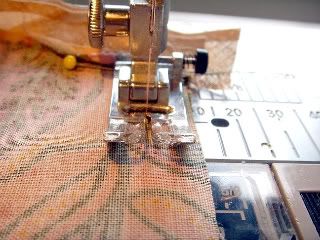
Start by pinning your bias binding onto the long curved edge of the frame. Do this by unfolding one side of the binding and pinning it (right sides together) along the edge. Sew along what was the fold line. Do the same for the inner curve. Press. Be persuasive with that bias binding and make it sit straight.

Photobucket

Now, with right sides together, match up your two side edges. They need to fit perfectly, so make sure you line up your binding seams evenly at top and bottom.

Sew a 1cm seam down the side. You don't need to finish off the edge. Trim the seam allowance and press.

Photobucket

Take the old shade off the lamp (because it's easier to fiddle with). Turn the new shade right side out, and pull over the old shade. Pull it tight, pin if necessary and make it fit. This is why we cut on the bias! Tuck the bias binding over the top, and under the bottom.

Photobucket

Thread some fine ribbon, decorative thread or yarn (I used eyelash yarn) onto a darning needle.

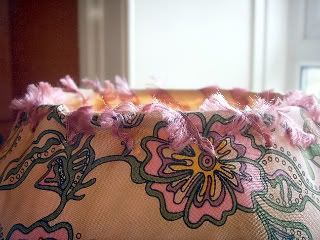
If necessary, mark out evenly spaced dots with chalk or pencil. Then, starting from the inside sew large stitches over the edge. This tucks the bias inside the shade and makes a decorative edge.

Photobucket

Photobucket

Fit the shade back onto the lamp and put in pride of place.

Hurray! No more fugly lamp-shades!

Thursday, 21 February 2008

Reconstructed T Shirt tutorial

I've seen this type of t-shirt somewhere on my web travels, and I don't know where. So, this is my own tutorial based on a t-shirt design (or idea) of someone else's. If it's yours, please do email me and I will put your credit on.

This idea just has so many variations - you could just go mad. It would also be fairly straight forward to add long sleeves - but I didn't have anything to cut up to do this.

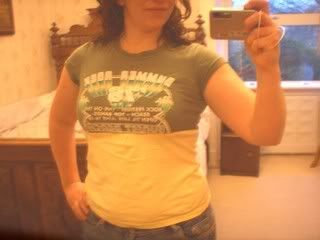
I love little skimpy t-shirts but, unfortunately, 32 looms and I no longer have a skimpy shirt type body. I don't know why they never cover my middle. I mean, my knockers have grown over the last couple of years but they're still not massive. Anyway, this is my solution of what to do with that too short t-shirt.

Photobucket

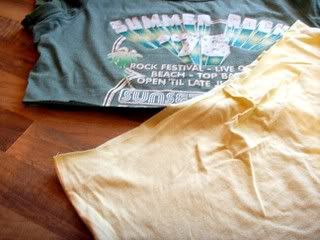
First, find two shirts that you still like but either no longer fit/ you're bored with.

Photobucket

Try them on first to measure where to cut. I didn't take a picture of this because my white gut just looked too tragic.

Mark just under your bust plus your seam allowance (I used about 1.5cms) on your "main" shirt, and then measure how much of your second shirt you want, and add your seam allowance to the top of this measurement before cutting.

Photobucket

Now, you'll make your life much easier if you have a needle for stretch fabrics. These are usually ball point needles and have a blue end on them. If not, you'll just have to sew slowly and you might need to go back over any skipped stitches. You could try putting some soluable stabilizer fabric over the top to help the stitches catch. Test your machine's settings on one of the off-cuts, and have a play about with what works best.

Measure out the centre of the cut edge and mark, on both pieces, back and front. Turn your bottom piece inside out and slip your top piece inside it. You should have the top piece inside your bottom piece, right sides together. Pin at the centre marks and the side seams first, then pin the rest of the edges together. Use plenty of pins, and stretch the shirts as necessary to make them fit together.

Photobucket

Photobucket

Now use a stretch stitch to sew the two sections together. Then zig zag or serge the edges to stop them fraying.

Photobucket

Turn the shirt the right way around, press the seam downwards, and stitch between the two layers using either a zig zag or overlock stitch.

Photobucket

And that's it. Am I too old to say "funky"?

Photobucket

Tuesday, 5 February 2008

Monday, 4 February 2008

Lounging Around

Oh it's so nice to be able to sew for me, for pleasure again.

Photobucket

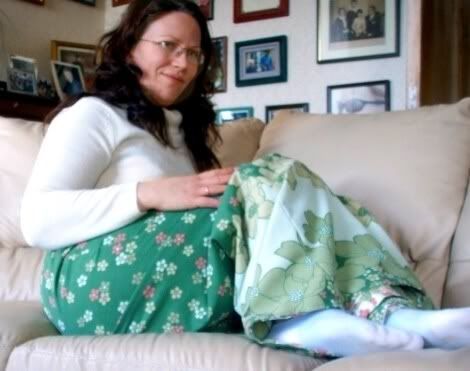
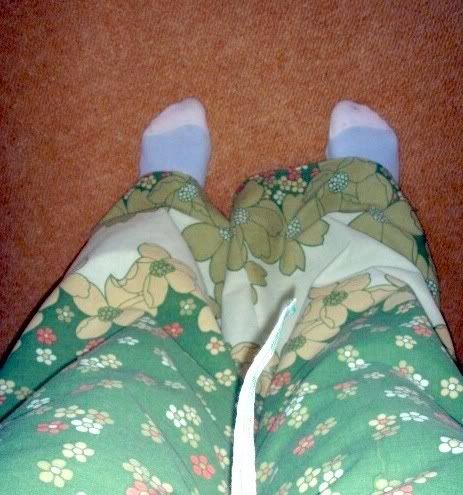
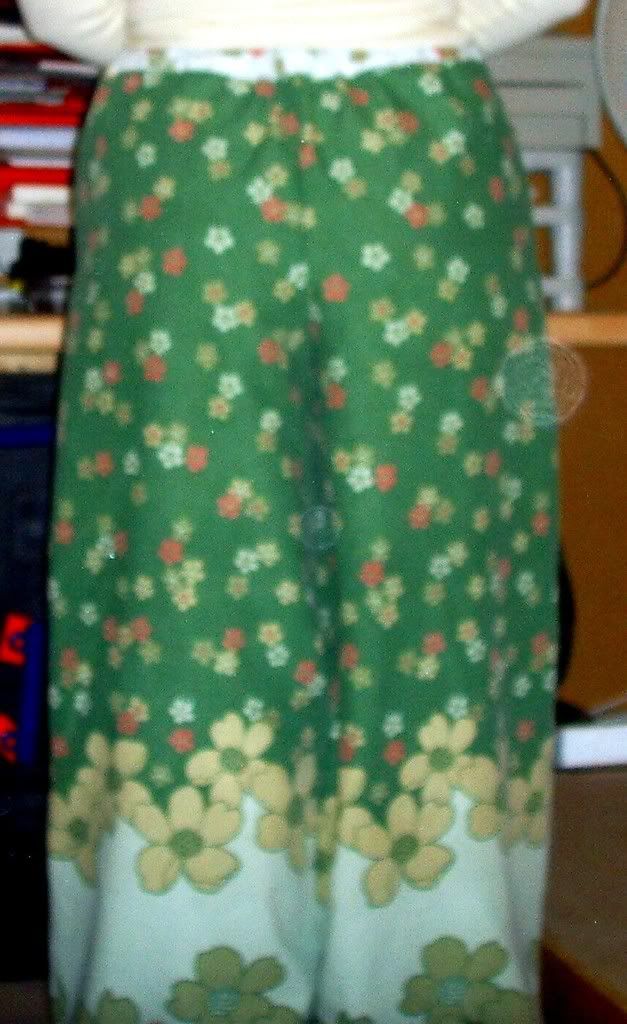
I made my lounge pants this afternoon. I have to say, I know I've made trousers before but these were so easy, I didn't even need instructions. I'm sorry about the pictures but, unlike Amy Butler, I don't have a professional photographer on hand.
Photobucket

I made a couple of changes to Amy's pattern:

I could tell straight away that the legs were too long, and the waist too low. So I adjusted that.

Photobucket

Because my fabric was quite light, and because it had a nice contrast side, I actually made 2 pairs of pants, then put one inside the other and pinned and stitched the seams inwards. I then turned the waistband outwards to create a contrasting casing.

Photobucket

I'm really pleased with the result, although I somehow managed to screw up my button holes (definitely the machine's fault) so I'll have to do a bit of manual fixing.


But overall, I am very pleased, and will definitely be looking out for more fabric to make another pair.

Groovy.

Oh, also, the Very Exciting Thing happened today. But I can't say what it is until probably Sunday. So you'll have to wait xx

Sunday, 3 February 2008

Egg me on!

Mr Marmadaisy and I were just speaking yesterday about what a difference having an extra hour of sunlight makes to the way one feels. All this grey, wet, gloomy weather has really been getting me down lately.

Yesterday was FREEZING but we missed out on the promised snow. I'm quite glad actually because, although I enjoy playing in the snow, it's not so much fun slipping about on ice when you're trying to feed horses and clean stables. It was also light by 8am and didn't go dark until after 4.30 so we really are starting to feel like the gloom is lifting. When one lives in the country, it seems that one's body clock alters with the daylight hours. In the Summer I work until 10pm but in the Winter I start to wind down at 3. Weird.

Anyway ...

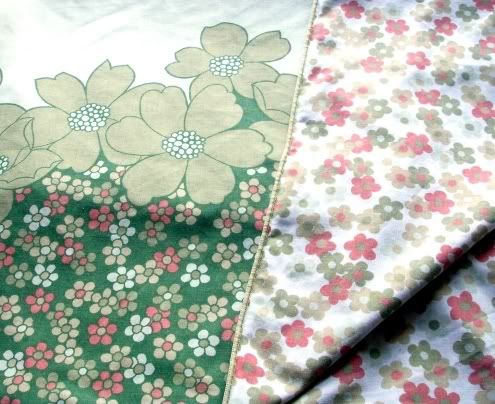
I've been after making myself some lounge pants from Amy B's In Stitches book for ages. They're really roomy and comfy and just the thing for, well, lounging. Problem is they use up metres of fabric, so that makes them quite costly. Unless, you manage to spot this fantastic duvet cover in a charity shop for £3. Bargain!

Photobucket

I think the woman thought I was quite mad when I said I was going to make trousers out of it. It's quite thin though so I think I'll make a lining from the reverse side of the duvet. I should also have enough to make a nice matching top too. Result!

I'll have a go at those this week and post the pics.

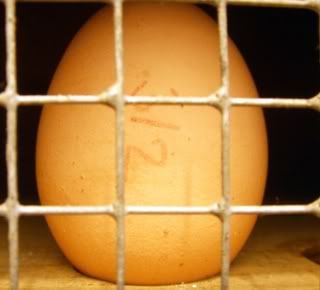
The other thing is that because of the extra bit of day-light the chickens have started to lay. Here is the first egg of 2008! In fact, it's the first since about October.

Photobucket

It's funny how such small things really cheer me up. I probably ought to get out more.

There's also something very exciting happening tomorrow (Monday) but I can't say much about that until later next week. But it's a goodie ...

Monday, 14 January 2008

Now, where did I put that Ark?

I really wish it would just stop raining. The whole place is flooded. It has run in through the window in the kitchen and soaked the rug.

I took these pictures this morning in the orchard.

Photobucket

Photobucket

Photobucket

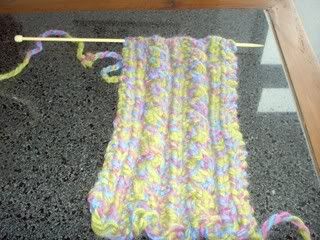
On a lighter note, all this stinky weather has given me more time to practise my knitting. Here is about 1/3 of a hat. It's a funny pattern that requires you to knit the main band, then pick up side stitches with circular needles and knit in the round. Strange. Anyway, I'll post more details if when I finish it.

Photobucket


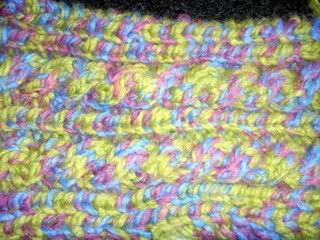
I'm not sure that the cables work all that well with the coloured yarn, but hey ho! I suppose it will cover any little slips that I make - who knew it was so difficult to count to 4? (BTW I've never done cable before and I think I'm doing quite well).

Photobucket