
Marmadaisy Basket bag tutorial
I just realised my last post should have been called "door stop me now" like the Queen song. Ah well.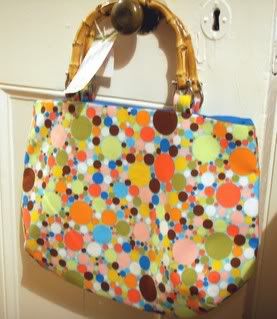
I have been asked for a basket bag tutorial. Unfortunately, I can't be bothered don't have time to make any more of these bags at the moment, but I have written a pattern and some instructions. You don't get any pics but if you can follow a sewing pattern you should be alright (and it's really easy). Please don't reproduce this pattern, it came out of my brain with much struggling and kicking and screaming. Feel free to use it or link to it. You can use it for making bags to sell but please credit me as the designer if you post anywhere. Thanks.
Draw your pattern.
Draw a rectangle 34cms long by 28cms high. Now extend each of the bottom lines by 4cms and join those to your top line to make a trapezium.
Right, now you measure in from the bottom corner on one side 10cms in and up, and join these two marks with a free hand curve. Fold paper in half and cut out the shape (so both sides are even).
Now you have your basic bag shape and you just need to put in the darts to give your bag a nice full shape.
Measure the half-way point between the edges of the curve by folding your paper until they meet and marking with a crease. Now measure 5cms up from that mark (in towards the middle of the pattern) and make a mark. Measure 2cms either side of you crease and join these up to your mid-point mark. Now you have a dart.
I have done a sketch to show you what it should look like.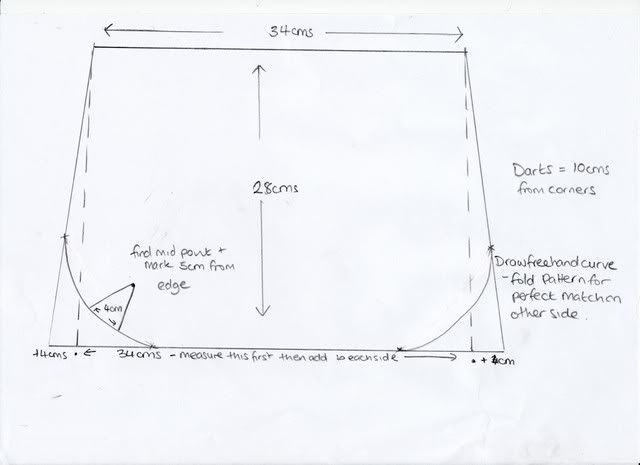
Cut pieces.
Cut 2 shell fabric, 2 lining, 2 iron on interfacing, 2 heavy sew-in interfacing. Also cut one strip of 24cms by 8cms from shell fabric and iron on interfacing for your handle tabs. Cut 2 squares of 7cms by 7cms from shell fabric and iron on interfacing for fastening backing.
Iron interfacing to shell fabric on wrong sides.
Transfer markings to all pieces.
Tabs
Fold in half lengthwise and press. Then fold side edges of the strap piece in to the middle and press again. Now fold in half lengthwise, pin, press and stitch. Cut into 4 equal lengths. Set aside.
Sewing
Put the shell and heavy sew in interfacing pieces together and pin in place. Sew the darts first by lining up the lines you have drawn and sewing along the line. Repeat for all darts and press towards the bottom.
Make a sandwich with shell fabric (right sides together) on the inside and the heavy sew-in on the outside. Sew together, taking care over the darts.
Sew the lining in the same way but leave a gap of at least 12cms in the bottom so you can pull the bag through.
Fastenings
Fold over .5cms on each edge of the fabric squares and press. Mitre the corners for neatness. Pin and stitch all around. Set aside.
Put it all together
Measure where to place your strap pieces by placing your handles centrally on the shell and marking where the straps should go. Baste strap pieces in place.
Measure where your snap fastening should go by marking the centre of the top edge of the lining and measure about 5cms down (or wherever you want your fastening). Pin and stitch your squares in place. For extra strength, iron a scrap of interfacing to the back of the lining behind where your fastening will go. Attach snap fastening.
Put shell inside lining, right sides together and stitch around the top 9ensuring your handle tabs are facing inside where you are stitching, in between the layers).
Turn right way around and slip stitch bottom hole shut.
Press all edges and attach handles.
Any problems with it, get in touch.
![]()


No comments:
Post a Comment