Reconstructed T Shirt tutorial
I've seen this type of t-shirt somewhere on my web travels, and I don't know where. So, this is my own tutorial based on a t-shirt design (or idea) of someone else's. If it's yours, please do email me and I will put your credit on.
This idea just has so many variations - you could just go mad. It would also be fairly straight forward to add long sleeves - but I didn't have anything to cut up to do this.
I love little skimpy t-shirts but, unfortunately, 32 looms and I no longer have a skimpy shirt type body. I don't know why they never cover my middle. I mean, my knockers have grown over the last couple of years but they're still not massive. Anyway, this is my solution of what to do with that too short t-shirt.
First, find two shirts that you still like but either no longer fit/ you're bored with.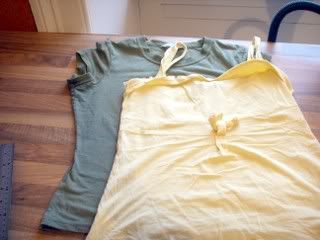
Try them on first to measure where to cut. I didn't take a picture of this because my white gut just looked too tragic.
Mark just under your bust plus your seam allowance (I used about 1.5cms) on your "main" shirt, and then measure how much of your second shirt you want, and add your seam allowance to the top of this measurement before cutting.
Now, you'll make your life much easier if you have a needle for stretch fabrics. These are usually ball point needles and have a blue end on them. If not, you'll just have to sew slowly and you might need to go back over any skipped stitches. You could try putting some soluable stabilizer fabric over the top to help the stitches catch. Test your machine's settings on one of the off-cuts, and have a play about with what works best.
Measure out the centre of the cut edge and mark, on both pieces, back and front. Turn your bottom piece inside out and slip your top piece inside it. You should have the top piece inside your bottom piece, right sides together. Pin at the centre marks and the side seams first, then pin the rest of the edges together. Use plenty of pins, and stretch the shirts as necessary to make them fit together.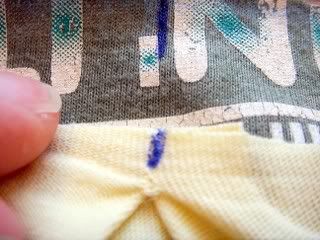
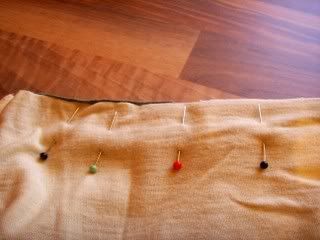
Now use a stretch stitch to sew the two sections together. Then zig zag or serge the edges to stop them fraying.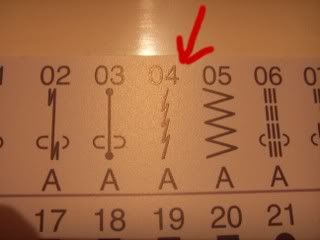
Turn the shirt the right way around, press the seam downwards, and stitch between the two layers using either a zig zag or overlock stitch.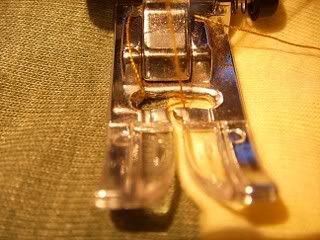
And that's it. Am I too old to say "funky"?


6 comments:
No of course you're not too old to say funky...and funky is what it is.
I have a drawer full of similar t-shirts so this is excellent
What a fabulous tutorial. Thank you. I have lots of t shirts that are too short and I am getting a bit too old to be showing my midriff!
Ooh, I have that stitch on my machine too!! Bx
Oooh! That is awesomely awesome! I am SO gonna do this! My mid-part peeks out a little sometimes with lots of my t-shirts. And it ain't too pretty.
two children mean that noone should see my stomach. I love this idea, and so simple. well done
Or if you are a really lucky Marmadaisy your mummy will have bought you a couple of new longer t-shirts for your forthcoming 32nd birthday.xx..What about fluffy folk like me who find not only is the t-shirt too short but not wide enough?will three sewn together work??? Ha Ha
what a coool idea, I had thought of a similar thing for my 12 year old and his much loved "che guevara" t-shirt which is somewhere near his armpits now as he's had it since he was 7. Oh please please ENJOY being 32 .. I would sell my soul to the Devil and all the demons in hell to be 32 again!!! (when you're nearly 42 you'll beleive me!) ..xx
Post a Comment