Fat Quarter Friday - Mousemat Tutorial
Welcome to the first "official" fat quarter Friday tutorial. Please feel free to use this tutorial to make your own mousemat to use or give as a gift, but please do not make them to sell without my permission. If you pass this tutorial on please link back to this blog. And if you make one, I'd LOVE to see it.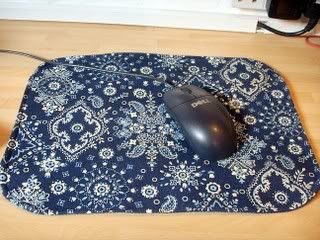
You will need:
Fat quarter of fabric (either make the two sides the same or use a contrasting base fabric, I used cord for my base)
Something to draw around to make the template, and some newspaper
Heavy sew-in interfacing
Iron-on interfacing
A piece of lino, some craft foam or an old mousemat
Acrylic sealer or mod podge (optional)
Make the pattern by drawing around an old mousemat, a chopping board, a plate, or just measure out the shape you want.
Test your chosen fabric under your mouse, as some can be a bit choosy.
Cut out the pieces using your template:
1 sew-in interfacing
1 iron-on interfacing
1 piece of lino or craft foam
Lay the template on the wrong side of your fabric and draw around it in chalk or pen. Then, adding a 1cm seam allowance all the way around, cut out the shape. The pen mark will show you where to stitch so you get a perfect line. Either cut 2 of these, or cut one in your fabric and one contrast piece for the bottom.
To put it together:
Iron the interfacing on to the wrong side of your fabric piece.
Pin the two pieces of fabric together (right sides together) and stitch all around, leaving a gap big enough to slip the lino through and back stitching at each end.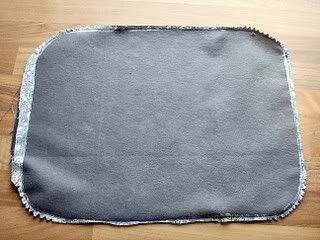
Trim all the seams, except the side that hasn't been sewn yet, and clip at the corners. This reduces bulk as we want the mousemat to be as flat as possible.
Turn the mousemat right side out, push out the corners and fold the open sides in - then press.
Insert the lino and sew-in interfacing (with the interfacing on top) through the hole and smooth out. If you want a more rigid mat you could use a piece of cardboard, template plastic or timtex as well. Make sure your sew-in is on top as this gives a bit of 'give' to the top fabric.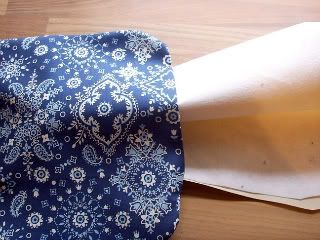
Tuck the open edges under the lino and pin in place.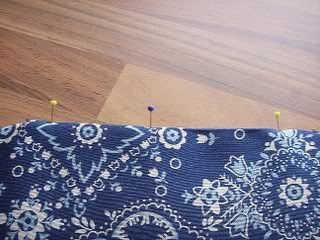
Top stitch the whole way around the edge - about 5mm from the edge. Press again.
*Optional*
You can leave it like that, or you can add some sealer to protect the fabric and help the mouse slip easily over it. I used spray on acrylic sealer, but mod podge would work well for this too. Before applying, test on a piece of scrap fabric to make sure you like the result. Follow the directions on your chosen sealer to apply to the top fabric side.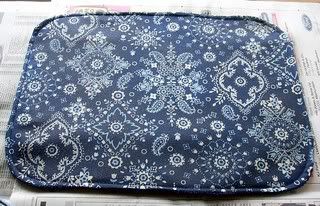
Allow to dry completely before use!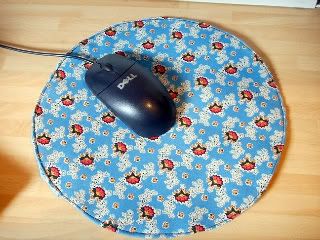
Blogger isn't very good at giving me email addresses to reply to your comments, so if you want to ask a question I will answer you in the comments section of this post. Alternatively, send me an email (the address in in the right hand side bar)





14 comments:
Great tutorial!! Your mousemats are so much prettier than ours. DH has a very boring 'Periodic Table of the Elements' and is rather too attached to it!
Might have to sneak a flowery one under the mouse and see if he notices!
xx
Very cool. My mousemat at work is crap - I might have to appropriate it from there and brighen it up a bit with this.
Great First "FQF" :)
love xMx
Great Firts project will have to try one to brighten up my desk.
Great Firts project will have to try one to brighten up my desk.
How pretty, an so useful too!How often do we make lovely things but wonder what to do with them, other than display them!
Great stuff! Keep it comming.
x Vicky x
Oh - they are lovely!
April xx
Excellent idea. I have just bought a compact laptop which could do with a compact new mat!
Oh fab tutorial, we've got laptops so no need for a mousemat, think I'm going to make a few up as table mats instead. Thanks for sharing
twiggy x
Love this idea...mousemats are SO boring !
Love the mousemat you are a clever blogger.x
just fab well done anna
Lovely mousemat , we have a boring one at home at the mo ... but not for much longer !!
Sara x
I made a mouse mat using your tutorial and posted it on my blog today. Thank you so much for sharing this tutorial as well as all the others I found on your site.
Post a Comment