Fat Quarter Friday Tutorial - Summer hat
This IS cheating a little, as it actually takes a little more than a fat quarter (but just a little).
This hat is based on a 57cm hat – which fits my head. I don’t know if I have a larger or smaller than average head or not so it would be best to either measure your own head or measure a hat that you like the fit of. You will then need to adjust the measurements accordingly. (To work out the measurements, measure around your head where your hat would sit, divide the head measurement by 6.28 then minus 1cm to get the length of the string for the centre hole (don't forget this needs to be a bit smaller than your head to allow for the seam). To get the measurement for the top circle, add 2cm to the length of the string to give plenty of room for the seam allowance).
You can also make the hat stiffer than mine if you like by using timtex or similar. I’ve gone for a softer version because I wanted to be able to fold it up, put it into a bag, throw it into the wash and so on. Of course, you can also increse the width of the brim by making your donut shape wider.
 You will need:
 A little over ¼ yard fabric (about ½ yard if you want to put a flower embellishment on it)
The same amount of lining fabric
½ yard sew in interfacing
Newspaper, pencil and string
To make the pattern:
Fold a piece of newspaper into quarters, matching the sides perfectly. Use tape to secure the paper to your table.
Attach a piece of string to a pencil, taping in place. Measure 10.5cm from the pen and stick a pin through the string. Put the pin in the corner of the folded paper and draw an arc. Cut this out, this will be the top of the hat.
Repeat the above steps, measuring 8.5cm but before cutting out, draw another arc by measuring out 16.5cm. Cut out the big arc, and the centre arc. This will make a ring shape, this will be the brim.

The red mark shows what the arc should look like.
Cut out the fabric pieces: In your main fabric, cut 1 brim, 1 top and 1 strip 60cm x 10cm. In your lining fabric, cut the same. In your sew-in interfacing, cut the same, plus an extra brim.
Lay out your pieces as follows. The gap in the middle where the ruler is, is where your long strip will be cut (on the bias).
To put it together:
Machine baste the sew-in pieces to the main fabric pieces (leaving one sew-in brim spare), make sure to keep your stitches less than 1cm from the edge.
 Sew the short sides of the strip together with a 1cm allowance. Press, and trim the seam.
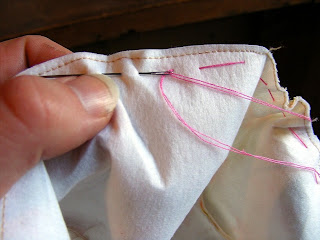
Attach the brim to the top piece, right sides together. Pin in place then stitch. You might need to slide the pieces until it fits properly. Make sure you keep the shape of the brim, so that the hat stays round. With a sewing needle and a double thread, run a line of long running stitches all around the bottom of the hat, fixing with a knot at one end. Pull the thread slightly to gather, until it fits into the hole in the brim. Pin in place, and stitch. Press the seams and trim them both down.

 Clipping into the seam allowance on the centre hole of the brim will help to fit the pieces together.
Sew the lining strip and attach to the lining top in the same way above.
Place the lining brim piece (right side down) and then the extra sew-in lining piece over the main hat, so that it goes OVER the brim. You should have interfacing-brim-lining-interfacing.
 Here is the top section of hat.
 Lay the lining and then the extra interfacing over the brim of the made up hat.
Smooth the layers, pin together. Sew all around the outside of the brim. You might find it easier to use a walking foot, if you have one.
 Use plenty of pins to keep the pieces together, sew slowly, and use a walking foot if you have one.
Trim the seam. Turn the brim right side out and press. The brim should now be right side up, with the lining underneath and two layers of interfacing in-between.
Top stitch close to the edge of the brim.
 Run a long running stitch around the bottom of the lining hat piece. Push the lining hat piece into the main hat, wrong sides together. Then gather the stitches so that it fits the hole in the lining of the brim.
(I forgot to take a picture of this bit. You are basically going to attach the top part of the hat lining to the inner of the brim lining piece.)
Neatly slip stitch the inner brim to the inner hat – or - turn the edges inwards, pin and machine stitch.
Optional:
I made a fabric flower to cover the seam in mine, but this option might be a bit twee. To make the flower, take a strip of fabric 30cm x 8cm and fold in half lengthways (wrong sides together). Do not press. Tuck the two short edges in to make a neat end. Run a line of running stitch along the open edge. Gather the thread to pull the edge into a frill. Shape the flower and stitch in the middle. Attach a button or two to cover the centre. Then pin, stitch or glue over the seam.
Now all we need is some sunshine!


9 comments:
WOW!!! That hat is amazing!!! I'd get some in your shop, sharpish - in time for summer!! (don't fall off chair laughing at suggestion that we might actually get a summer this year!) ...
woo hoo how timely is that i was thinking this week that i need to make martha a new sun hat so i can use your pattern for one. Fantastic she will be the most stylish toddler in town
Very cool. I love it. I think Gracie would love one of those - I wonder what fabric I have in my stash. I don't know about having to do actual Maths though - that might be a bit much to ask ;)
xMx
What a great hat Mr blossomsmum says "looks a bit complicated"but isn't she a clever blogger!!xx
This is seriously cute! I love that it isn't so stiff that you can just shove it into a bag and go!
Cute cute hat. I haven't been into hats for a looooonnnng time, but this almost made me want to.
I link the tutorial in http://laboresenred.blogspot.com
Grettings from spain!
SIONA
This seems to be a great site for Portable Pools, Plastic Pools,Sun Hats, Water Footwear, Queen Airbed With Pump.I had been relying on http://www.togga.co.uk earlier and they too offered good stuff.
I love that hat!
Post a Comment