Needle cushion tutorial
Now that I have started knitting, I have realised that - apart from needles, yarn and pattern - the knitter always carries around darning or tapestry needles for weaving in end threads and sewing pieces together. I have lots of mini pin cushions, but I decided that what I actually needed was a flat cushion for needles, which I can slot into the zip pocket of my knitting bag.
So I made myself one.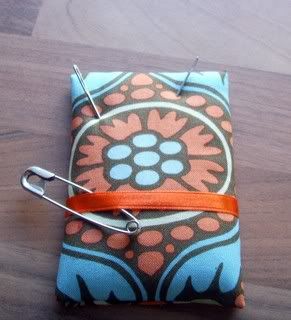
It has a cushion side to slip needles into, and a ribbon for holding safety pins. It is small enough to pop into your bag or needle case.
Here is the tutorial for it. As usual, unless I say otherwise, this is my own work. Please feel free to make your own or pass this link on, but please don't sell them on or distribute the tutorial without my permission. It's rude.
This is very easy to do and shouldn't take long, but there are lots of steps so it's a bit picture heavy. You'll also get gluey fingers if you're not careful.
You need:
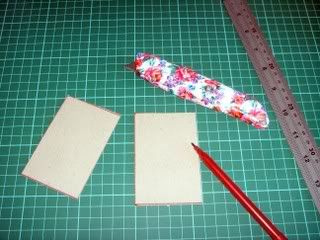
- 2 pieces of 6cm x 9cm cardboard (I used the back of an A4 refill pad, it needs to be quite thick - thicker than a cereal box, if that makes sense) *** or see update at the bottom of this page.
- 2 scraps of fabric, 10cm x 13 cm (try to place your pattern centrally, I just used scraps so mine isn't as nicely placed as I would have liked)
- 1 piece of wadding - I used a double thickness of 2oz wadding because that was what I had. Make it slightly smaller than your card about 5cm x 8cm.
- Small piece of ribbon
- Some glue, brush, scissors etc
Cut your card and fabric pieces to size.
Spread glue on both card pieces. I used PVA high tack, which I blobbed in the middle and used a brush to spread out. This ensures that you get even coverage and stops your glue squidging all over the place. If using the kind of glue (like I did) that would seep through fabric, leave it to dry until tacky - about 30secs to a minute.
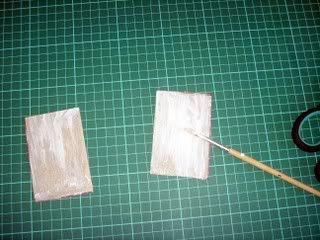
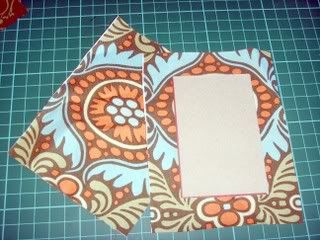
With wrong side of fabric facing you, place (centrally) one piece of card, glue side down, on to one of your fabric pieces. Make a sandwich with the other piece, wadding in the middle and the card (glue side down) on top. You now have 1 card piece with fabric stuck to it, and 1 with wadding stuck to it and fabric over the wadding.
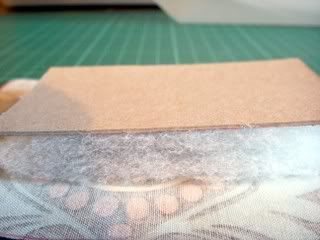
Mitre the corners. Leave a couple of mm from the corner edge - you'll see why in a minute. When mitring the wadding piece, squash the wadding down so that you can clearly see where to cut and do not cut too close to the corner. You can always trim a little more off if you need to.
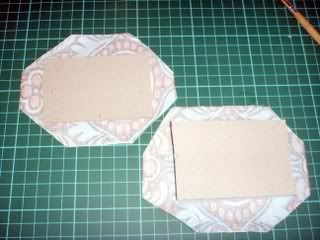
Spread glue around the edges and leave to dry for a few seconds before pressing down the two long sides. Pull the fabric tight as you do this to keep it nice and neat. Ensure the sides are well stuck.
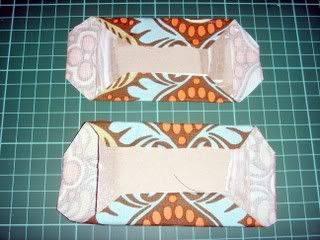
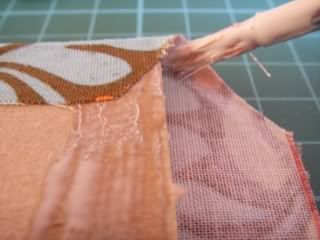
Now, take a tiny amount of glue on your brush (or use a cotton bud or similar) and brush a tiny amount of glue into each of the inner corners. I mean a tiny amount, literally enough to stick that bit of the corner to itself.
Using the end if your brush (or tip of a pencil) gently push the fabric inwards, towards the corner, covering the very corner of the cardboard. This gives you a nice tidy mitre. Do this one card at a time, so that the glue doesn't dry while you are working.
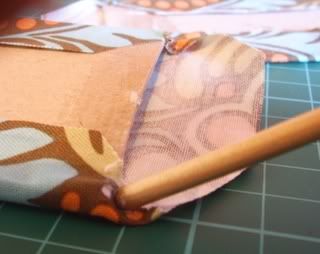
Now fold the two short sides over and stick in place as before.
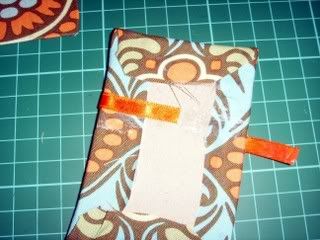
Take a length of ribbon about 10cm long and wrap, horizontally, around the front of the cushiony piece, about 3-4 cm up. Stick it down at the back.
Apply a good dollop of glue to both back-sides (lol) and spread all around. Make sure to give a good even spread, and be careful not to slop glue on your fabric, because you'll ruin your work if you do. Go as far up to the edges as you can without getting any glue on the sides. Leave for a minute until tacky, and press wrong sides together.
Et Voila!
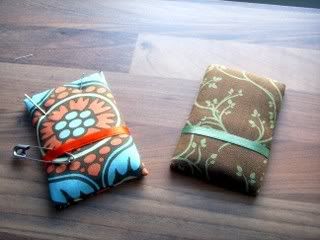
It has also just occured to me that this would probably hold a small pair of snips as well. But I haven't tried it. You might have to substitute the ribbon for elastic, which isn't so pretty.
**Update. This does indeed hold a small pair of scissors (well, mine anyway). You could also store your stitch holders on the ribbon bit, that would keep all your small bits together. Gosh, I think I'm onto something here! **
***Another update! I was just swatching up some yarn when I realised that they always quote a swatch of 10cm or 4" - and I thought "hey, why not make the needle holder 10cms long instead of 9 that way, you have a handy swatch measure and you don't need a ruler" So, MKII needle holder will be 10cms long, I think ***





1 comment:
I have been driving myself bonkers this week with what to do with my darning needle mid-bunny. I think I might just have to whip one of these up for me. Great tutorial btw - you're such a clever sod ;)
love M
Post a Comment