Make your own panties tutorial
I've had a couple of emails and comments asking "how easy are those knickers to make?". I've also been asked where my ideas come from. In this case - which is typical - I was browsing ebay for a teflon foot and found a shop selling cute pink scalloped elastic. I thought it was sweet, and bought it on the strength of thinking what to do with it later. By the time it arrived, I had my idea.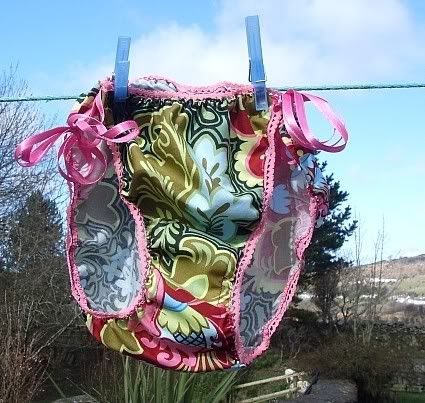
I've made another pair and taken pics, so you can SEE how easy they are. This is a great way to use up your fat quarters (we all have them lying around don't we?)
As with all my tutorials, this is totally customizable (is that even a word?). This is my own work, so if you repost PLEASE link back to me, thanks!
To make the pattern.
We all have different preferences when it come to undergarments. Personally, because it's cold in Wales, I like mine to cover my bits. You could change this pattern to make them however you prefer.
Find a pair of knickers that your don't mind cutting up. Preferably ones with the elastic starting to go. We ALL have those, don't we? Cut the sides open and lay the fabric flat. Cut off the elastic if it helps. Pin the old knickers on some paper, I used a piece of newspaper for my pattern becuase it's cheap and you can use lots to make different variations. Now cut it out, and then try to see how it fits.
A good way is to pin to the underwear you are already wearing. I have saved you all the horror of pictures of these early stages. Adjust as necessary until you are happy with the basic shape. Then, fold the paper in half lengthwise and neaten all the edges off (so we get even curves on both sides of the pattern). You now have something like a bottom heavy hour glass.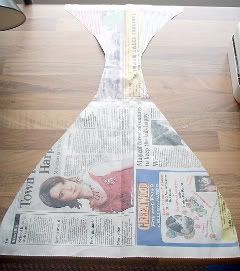
Unfold and do a final check for fit.
To make the knickers.
Before cutting out, think about the fabric you are using. If you are using plain fabric, or one without an obvious "right" and "wrong" way up, proceed. If your fabric has a pattern with a right way up, you will need to split your pattern in half at the middle and cut out two sections (leaving a seam allowance), otherwise you'll end up with half of your design upside down.
For comfort I've added a gusset section. For obvious reasons, this should be cotton (not synthetic). You need to adjust this to fit your pattern, adding a 1cm seam allowance to each side. Mine was about 14cm by about 8cm.
Cut off the corners of the strip and fold all edges in, press and sew down with a continous line of stitching. Leave the needle in the "down" position when turning corners.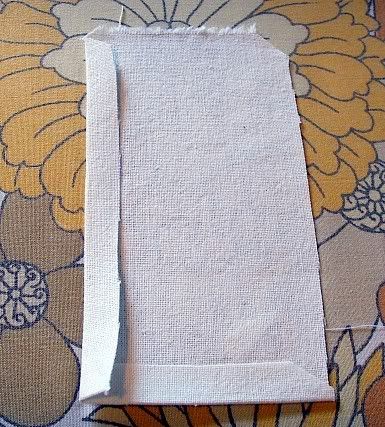
Pin in place on the wrong side of the fabric piece, and sew along the two long edges.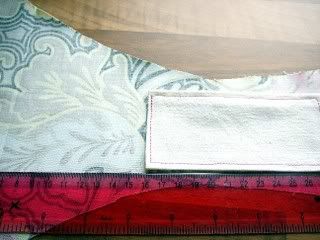
Attaching the elastic.
You'll make life a lot easier if you use a needle for stretch fabrics and a stretch stich on your machine. if you have an overlocker, even better.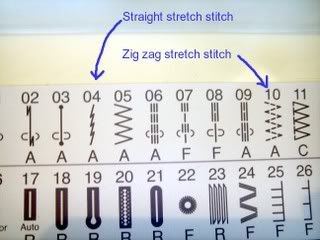
Starting at one of the straight edges at the back or front, line up the edge of the elastic with the raw edge, on the right side of the fabric. Use a zig zag stitch to stitch the elastic to the edge of the fabric, catching the raw edge in the zig zag stitch. Pull the elastic slightly as you feed it through the machine, taking your time.
Then fold the fabric to the wrong side (so that the elastic is now decorative side out) and use a straight stitch to stitch in place (pulling the fabric flat as you do so).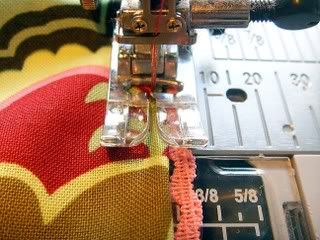
Repeat for both top sides, and around the legs.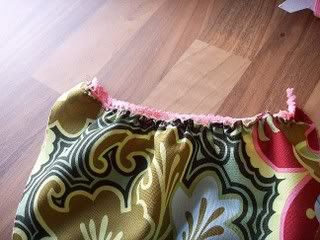
The edges should all be like this.
Measure 4 pieces of matching ribbon. In my case, I wanted the ties 30cm long, but I was using a ribbon that frays easily. You could either run some fray stop along the edge or, like me, use a double length so that both raw ends are encased in the side seam. Of course, you could also make your pattern so that you actually sew the side seams together at this point.
I cut 4x 60cms (so that I could double it over).
Line the raw ribbon edge with the raw side edge and fold over twice.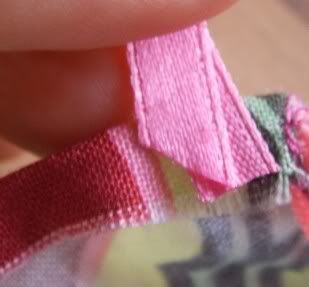
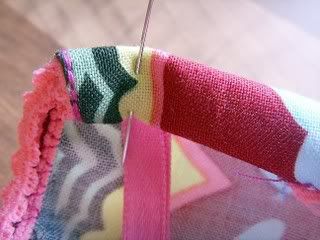
This traps the ribbon in the side seam. Pin in place and sew a couple of layers of stitching along the side seam for strength.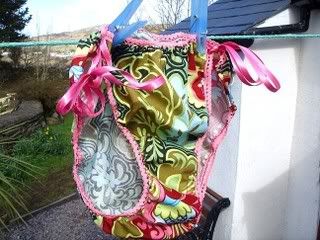
Now parade around your bedroom in your funky new knickers.
**********UPDATE*************
I was asked if I used stretch fabric for the main part, and here is my answer.
No, I just used cotton. I do have some T shirt fabric that I mights have a play with. Without wanting to sound too rude about it, if you have a "larger" bottom (like my big fat thing!) don't stretch your elastic so tightly so it doesn't make them baggy. I suggest having a play with some leftovers if you're unsure. Have fun.





10 comments:
They are so pretty! I may have a go at those - despite my totally irrational fear of sewing machines running away with me!!
By the way - as I was rummaging through the bottom of my work box I found a small piece of machine embroidery of my name - which you made for me when we were at school - do you remember??
April xx
Fair enough - I was just wondering!
Thanks for the strawberry advice
April xx
Very nice, David Emanuelle designs my outfits,have I mentioned he was my personal shopper today...
my god you are so so so productive you make me feel tired. They are absolutely great and i have loads of fat quarters that i fell in love with meaning to do wonderful things with etc etc. I am at the moment going mad trying to teach myself to crochet. It is not going well
These are hilarious, I wonder if I'll dare!And pants like these need to be seen!
wow. these are truly adorable!! I've never thought about making my own panties, but this actually looks like fun!
Nice tutorial. Might be a nice use for the overlocker if I can find some elastic as pretty as yours, instead of the industrial stuff I currently have in my stash :)
Brilliant! I love them, saw you on craftjuice, great tutorial, will have a go when I get time, got loads of nice fabric so will have nice knickers soon! xxx
Drat - I was hoping it wouldn't require a sewing machine ;-)
Thanks for the tutorial anyway :)
so nice
it is the same as mu mom's panty
Post a Comment