Waste bin tutorial
Awwww, my Dad loves these things. I'll have to get him making something, I think.
I must give credit for the original idea, which I have altered. According to the original tutorial:
"copyright 2008 j. caroline designs, l.p.Feel free to use this pattern and instructions for personal or commercial use. Please do not reprint these instructions without permission. You may link to this page from your website without requesting permission."
So I guess we're OK. And this is quite a bit different anyway.
Obviously, this is a sewing room bin. Because it's fabric and cardboard it would be no good for sticky or wet things. You could make a version with oilcloth and plastic sheeting, though.
You need:
4 pieces of thick card (I recycled a strong box) 10" x 14"
1 piece of card 10" x 10"
Shell fabric - cut 4 pieces 11"(wide)x15"(long)
1 piece 11" x 11"
Lining fabric - cut 4 pieces 11"x15.5" (lining sides are a bit longer to allow a bit of room later)
1 piece 11" x 11"
Heavy drill or canvas fabric - cut 4 pieces 11"(wide)x15"(long)
1 piece 11" x 11"
Duct or gaffer tape
Pins and clothes pegs
Fabric glue (I use this one)
How to put it together:
Now I won't lie, this is a cumbersome project. It isn't difficult, but it requires a little precise sewing and a little patience. I'm notoriously bad at both, but by marking where you need to sew and what Lisa calls "persuasive ironing" you'll make the job a lot easier. I learned these things making the Secret Thing. We'll make it as easy for ourselves as possible, OK? Go on, have a go!
First of all, cut your pieces as straight as you can. This is because if you get a slight bias, it won't all lie flat. Then press all your pieces. The seam allowance is 1/2 inch or 1.25 cm (because that made it easy to calculate. See? I like things easy)
Pin, then machine baste (the longest stitch on your machine) all your drill pieces to the wrong side of your outer pieces, within the seam allowance. In other words, sew less than 1/2 " from the edge. Go slowly, and don't let it pucker or twist or you'll have a nightmare later on. Trim any excess drill so that all your edges are as straight as you can get them.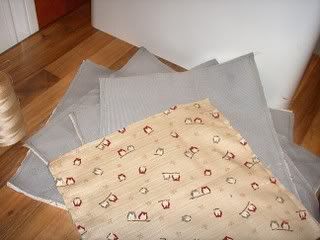
Next, we need to hem the top edge of each side piece (that's the rectangular pieces). When sewn together, these will all need to be perfectly straight so here's how to do it.
On the drill side, measure 1" from the top left edge and the same from the top right edge, then draw a line using a ruler between the two. Now fold the top over and line up the edge with the line you have just drawn, and pin and iron in place. We draw the line because then we can easily see if we've gone astray. This is my top tip for avoiding wonky hems. Repeat this step for all side pieces.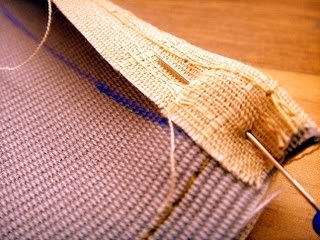
Now stitch along the hem (remember to reset your machine stitch) on all pieces.
Next, with right sides together, pin one side piece to the bottom piece. Measure and mark 1/2" from each edge of where this seam will be, this is so we can fold it all together later. Sew the side piece to the bottom piece, starting and stopping at your marks. Repeat on the opposite side (so you now have one long section). 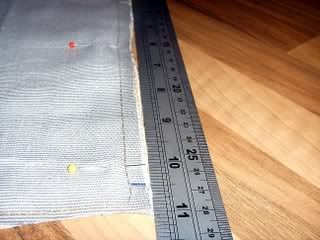
Press the seams and trim them if they feel a bit bulky. Now we need to attach the other side pieces to the bottom. This is easier because we didn't stitch right up to the edge before. Pin the first side piece in place, and feel with your fingers where the seam of the pieces you have already sewn are (they should be 1/2" from the edges again). Mark that spot, and sew inbetween these marks, so you are not trapping your corners in the stitching. Press and trim seams. Does that make sense?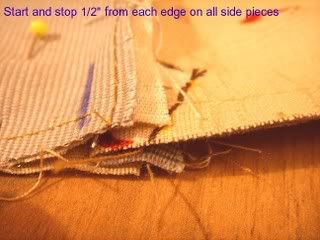
You now have a cross shape. 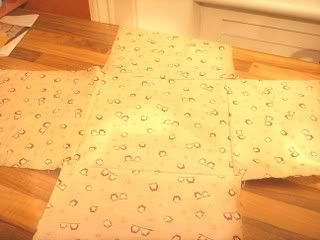
To attach the sides together, first of all clip the corners of all your pieces (there are three pieces on each corner). be sure to clip within the seam allowance, or you'll be swearing mightily later.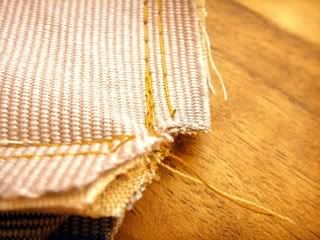
Pin right sides of the side pieces together, making sure your top edges are lined up, and stitch. Press and trim seams. You now have a box shaped shell. Well done.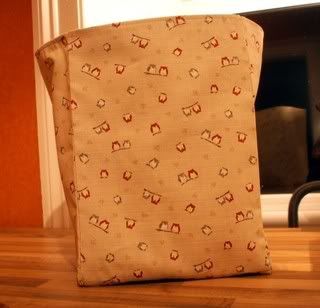
Now, do exactly the same with the lining but you don't need to hem the tops, just leave a raw edge.
That's all the sewing (and the hardest bit) all done. Well done!
Put the bottom cardboard piece in the bottom of the shell. Squash it in, it should be a tight fit but not so it alters the shape of the shell. Trim if necessary. Now fit in the side cardboard pieces. Again, some trimming may be necessary, just carefully slice small slithers off until it fits. It should be snug, but not sticking out. When you are happy with it, use gaffer tape along the corners to keep the cardboard in place.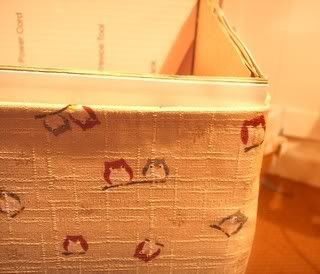
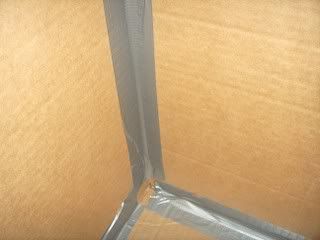
Put the lining inside the bin case (with the seams on the cardboard side), smooth out and pin in place. Fold the top edge over the cardboard, bewteen the card and the shell hem. This is why we made these sides just slightly longer, to allow room to do this easily. Pin downwards, into the cardboard and beware of sharp pins that might slice right down the side of your nail (ouchy). When you have pinned all edges in place and are happy with it, pull one hemmed egde away from the box, gently unpinning, and squeeze a line of glue along the shell hem edge, and then smooth back in place against the lining. You are sticking the shell hem to the lining. Use clothes pegs to hold in place until dry. 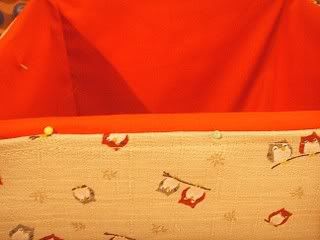
Repeat on each side, taking care to use plenty of pegs (especially on the corners).
Now, enjoy the impressed and admiring looks from your family and say "I made that!"
That sounds very complicated, but please DO have a go because it makes such a lovely bin and you'll be really pleased with yourself. 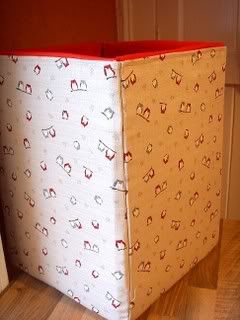
By the way, I also sliced a finger open on a garment label on Sunday whilst trying on a rather fetching pair of grey trousers. So my fingers are too sore to do much sewing. Boo!






3 comments:
Great tutorial. I will have to add it to the list of "projects I'd like to make" (which is becoming vast!).
love xMx
So cute - I'm bookmarking this one :)!
Marmadaisy! Just finished mine, will take pics right now! Mine is slightly wonky but still very practical!
Thank you!
Post a Comment